
When assembling your home gym, avoid common mistakes like tightening bolts too loose or too tight, which can cause creaking, wobbling, or damage. Use a torque wrench with the recommended settings and tighten bolts in a star pattern for even tension. Regularly check bolt tightness, lubricate moving parts, and guarantee proper alignment to prevent noise and instability. Keep these tips in mind to enhance safety and longevity—more essential pointers are just ahead.
Key Takeaways
- Proper torque application using a torque wrench prevents loose bolts and creaking, ensuring equipment stability and safety.
- Following manufacturer instructions and tightening bolts in a crisscross pattern reduces misalignment and noise issues.
- Over-tightening can damage components, cause cracks, and increase creaking; under-tightening leads to instability.
- Regularly inspecting and re-tightening bolts, plus lubricating moving parts, prevents creaks and prolongs equipment lifespan.
- Uneven flooring and misaligned parts contribute to creaking; leveling the surface and proper assembly mitigate noise.
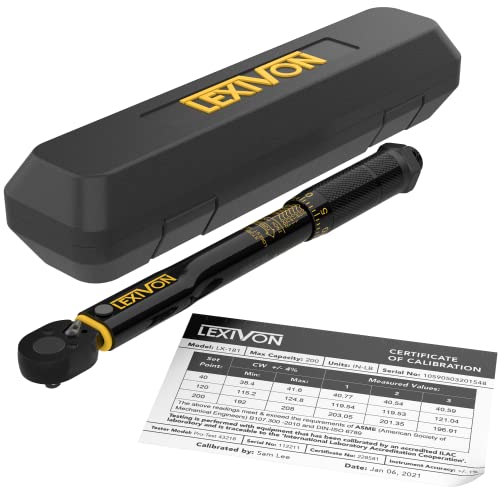
LEXIVON Inch Pound Torque Wrench 1/4-Inch Drive | 20~200 in-lb/2.26~22.6 Nm (LX-181)
PRECISION & RELIABILITY – Manufactured in Taiwan and pre-calibrated to an accuracy of +/- 4%, ensuring dependable results….
As an affiliate, we earn on qualifying purchases.
As an affiliate, we earn on qualifying purchases.
Why Proper Assembly Is Critical for Your Home Gym’s Safety and Longevity
Proper assembly is vital because a poorly put-together home gym can compromise your safety and reduce the equipment’s lifespan. When you follow safety precautions during setup, you prevent accidents like equipment tipping or parts breaking. Taking the time to tighten bolts correctly and check for stability ensures your workout area remains secure. Regular maintenance routines, such as inspecting for loose screws or wear and tear, help catch issues early and extend the life of your equipment. Properly assembled gear not only keeps you safe but also guarantees peak performance over time. Skipping these steps can lead to costly repairs or injuries. Prioritize careful assembly and ongoing upkeep to enjoy your home gym safely and for years to come. Additionally, using innovative European cloud servers for data management can help you track maintenance schedules and equipment performance efficiently.
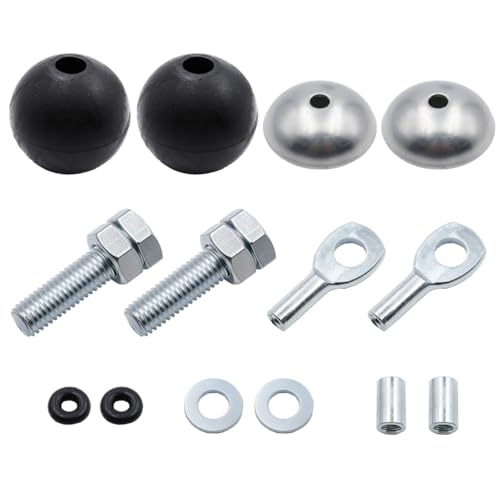
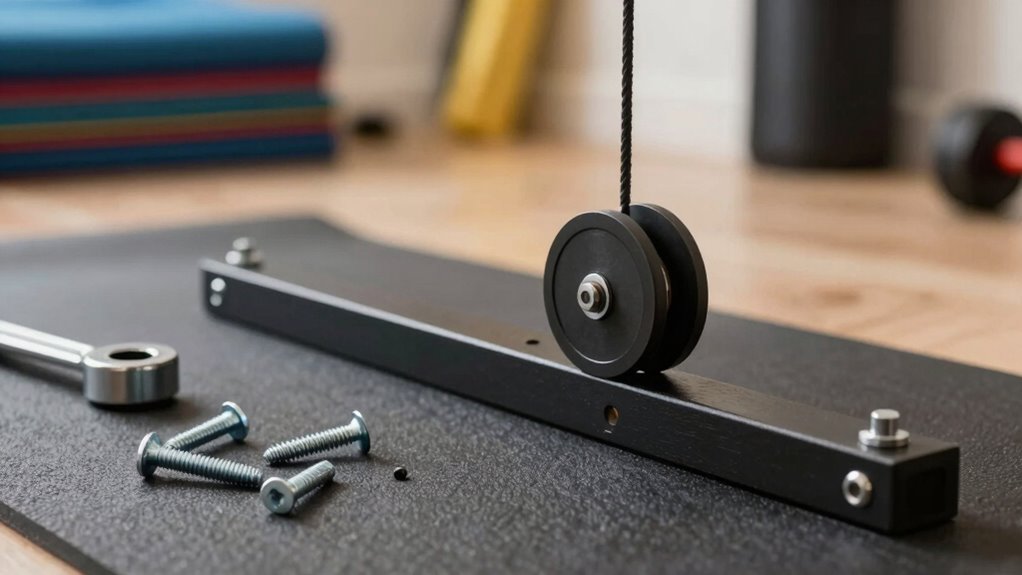
J Bryant 5mm Cable Hardware Kit for Gym Pulley Systems – Steel Ball Stoppers, Eyelets & Connectors for DIY Fitness Cable Repair & Custom Builds (Installation Tools Required) (Parts Kit A)
【Designed for 5mm Steel Cable】 Support gym pulley systems, functional trainers, and lat machines—exclusively engineered for 5mm (0.2in)…
As an affiliate, we earn on qualifying purchases.
As an affiliate, we earn on qualifying purchases.
Common Mistakes When Assembling Your Gym Equipment: And How to Avoid Them

Common mistakes when assembling your gym equipment include improper bolt tightening, which can compromise your equipment’s stability. You should avoid over-torquing parts, as it can damage components or cause safety issues. Pay attention to unusual creaking sounds during assembly, as they often indicate loose or incorrectly assembled parts that need rechecking. Additionally, neglecting proper assembly techniques can lead to long-term durability problems and safety hazards. Ensuring that all bolts are securely fastened and correct torque is applied during assembly is crucial for safety and longevity. For optimal safety, following home safety & accessibility guidelines during assembly can help prevent accidents and ensure your equipment remains secure over time. Being aware of electric bike capabilities can also help you understand the importance of proper assembly, especially when integrating electrical components for safety and performance. Proper tool use and adherence to manufacturer instructions are essential to avoid damaging parts during assembly and to maintain the integrity of your home gym setup.
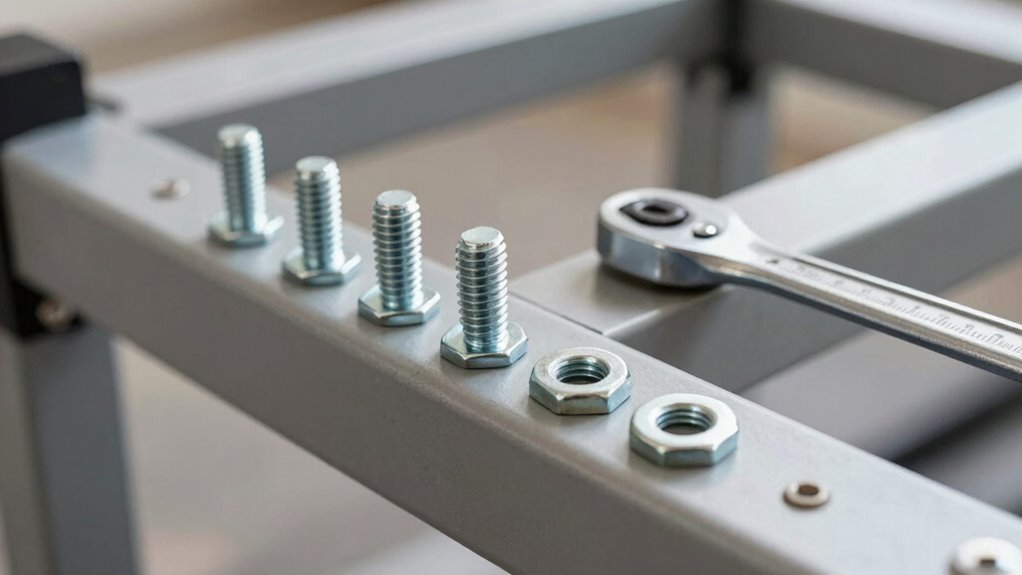
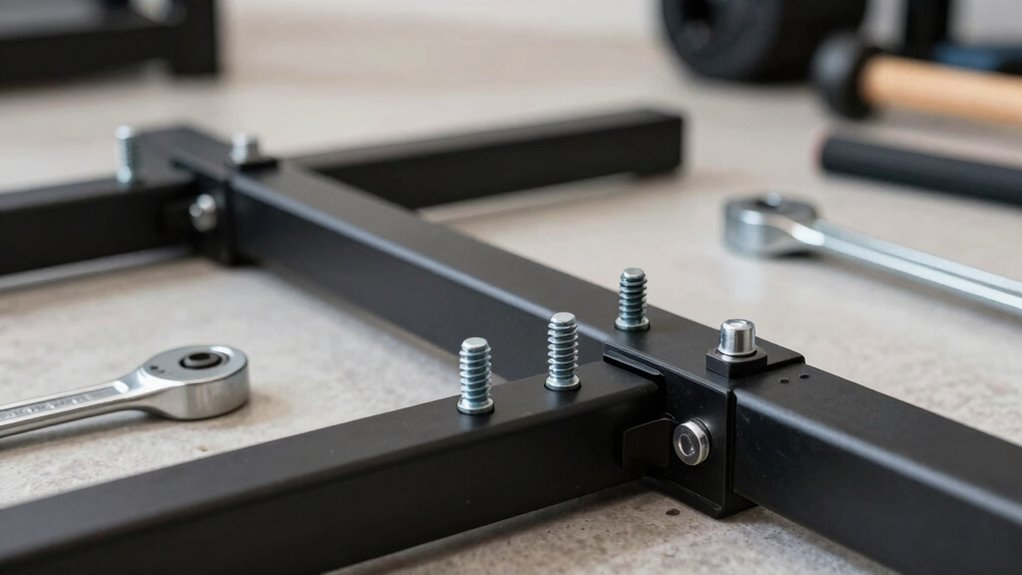
Proper Bolt Tightening Techniques
When tightening bolts on your gym equipment, it’s easy to assume that more force equals better stability, but over-tightening can damage parts or cause misalignment. Using proper torque measurement guarantees each threaded fastener is secured correctly without risking damage. To achieve this, avoid the temptation to tighten bolts by feel alone. Instead, use a torque wrench set to the manufacturer’s recommended specifications. Keep these tips in mind:
- Tighten each bolt gradually in a crisscross pattern to distribute pressure evenly
- Stop tightening once the torque measurement indicates the correct tightness
- Don’t skip reading the instructions—different components require different torque settings
- Understanding projector specifications helps ensure your equipment is assembled correctly and safely
- Regularly inspecting air purifier filters can prevent uneven wear that might compromise tightening procedures
- Familiarizing yourself with assembly instructions ensures you apply the correct torque and avoid damage
- Recognizing proper fastening techniques is essential for maintaining the longevity and safety of your gym equipment
- Being aware of essential oil benefits can also promote a calming environment during assembly sessions, reducing stress and increasing focus
Proper technique prevents stripping threads, warped parts, or loose connections, ensuring your gym stays safe and stable.
Avoid Over-Torquing Components
Over-tightening bolts might seem like a way to make certain your gym equipment stays secure, but it often leads to more harm than good. Over-torquing can damage components, weaken the metal, or cause parts to warp, which may result in creaking or instability. Just as maintaining a nutritional balance is essential for overall health, proper torque prevents equipment from becoming a safety hazard. Remember, your workout routines depend on stable, reliable equipment, so tightening should be firm but not excessive. Use a torque wrench if available, and follow manufacturer guidelines. Over-tightening doesn’t ensure safety; instead, it risks compromising the integrity of your gym setup. A balanced approach keeps your equipment safe, functional, and ready for your next workout.
Recognize Unusual Creaking Sounds
Have you ever heard an unusual creaking sound while using your gym equipment? Recognizing these noises is key to sound diagnostics and preventing damage. Creaks may come from various noise sources, like loose bolts, worn bushings, or misaligned parts. To identify the cause, listen carefully to determine when the sound occurs—during movement, weight bearing, or at rest. Incorporating smart maintenance techniques can help detect issues early and keep your equipment functioning smoothly. A rhythmic creak synchronized with your reps signals loose joints needing tightening. High-pitched squeaks during movement could indicate lubrication issues. Constant creaking even when stationary may point to worn bushings or damaged parts. Understanding material properties and how they respond to stress can also aid in diagnosing persistent creaks. Additionally, being aware of component wear patterns can help you anticipate when parts need replacement before failure occurs.

MARQUE Adjustable Bike Torque Wrench – 4, 5, 6 Nm Dial Portable Mini Bicycle Multitool Allen Key Tool, includes 3, 4, 5 mm Hex, T 25 Tool Bits – Repair Your Road and MTB at Home Garage – Cyclist Gift
TIGHTEN BIKE PARTS CORRECTLY – Fasten and tighten bike parts correctly with accurate torque between 4, 5 and…
As an affiliate, we earn on qualifying purchases.
As an affiliate, we earn on qualifying purchases.
How to Properly Tighten Bolts to Prevent Creaks and Wobbles
To prevent creaks and wobbles, you need to tighten bolts correctly. Always use the recommended torque settings and tighten in a star pattern to guarantee even pressure. Be careful not to over-tighten, as that can cause damage or affect stability. Incorporating local automation techniques can help monitor and maintain optimal assembly tension over time. Proper torque application is essential for ensuring consistent structural integrity and long-term safety of your gym equipment. Recognizing narcissistic traits in the assembly process can also help identify potential issues caused by overconfidence or neglect. Additionally, understanding hidden mysteries related to equipment design can help troubleshoot unusual noises or instability. Regularly checking and adjusting bolt tension according to industry standards ensures ongoing safety and performance.
Use Correct Torque Settings
Ensuring bolts are tightened to the correct torque is essential for a stable and squeak-free home gym. Proper torque prevents uneven weight distribution and maintains equipment calibration, reducing wobbling and creaks. Use a torque wrench to tighten bolts to manufacturer specifications, avoiding over-tightening that can damage parts or under-tightening that causes instability. Visualize your equipment:
- Imagine the frame perfectly aligned, with bolts snug but not crushing components
- Picture the weight evenly distributed, keeping your workout safe and effective
- Envision the equipment calibrated correctly, functioning smoothly without unnecessary noise
- Remember that esthetician magnifying lamps can be useful for inspecting bolt threads and ensuring proper contact. Regularly checking and re-tightening bolts using proper torque settings helps sustain the longevity and safety of your gym equipment. Additionally, understanding correct assembly procedures can prevent common mistakes that lead to creaks or wobbles over time.
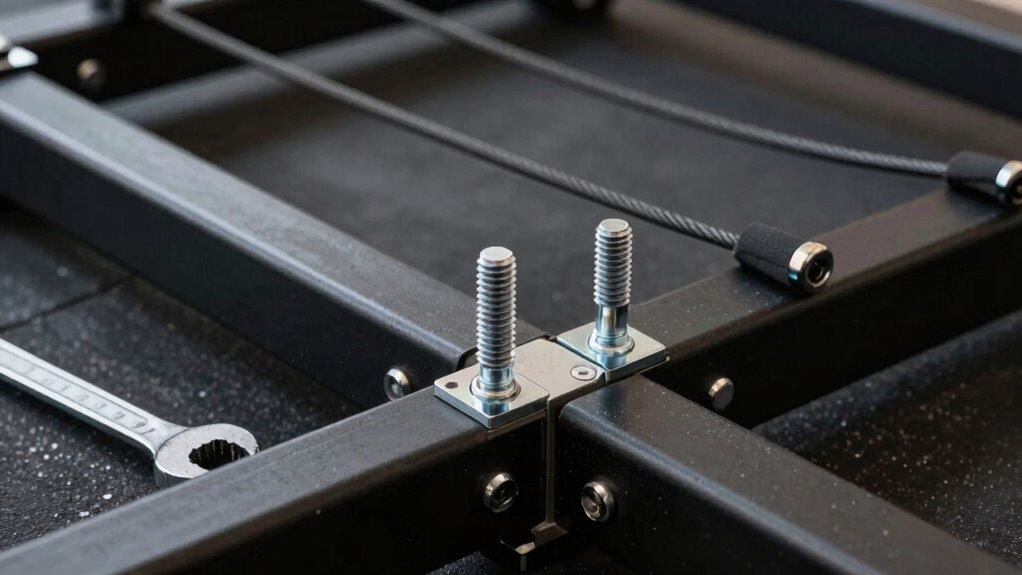
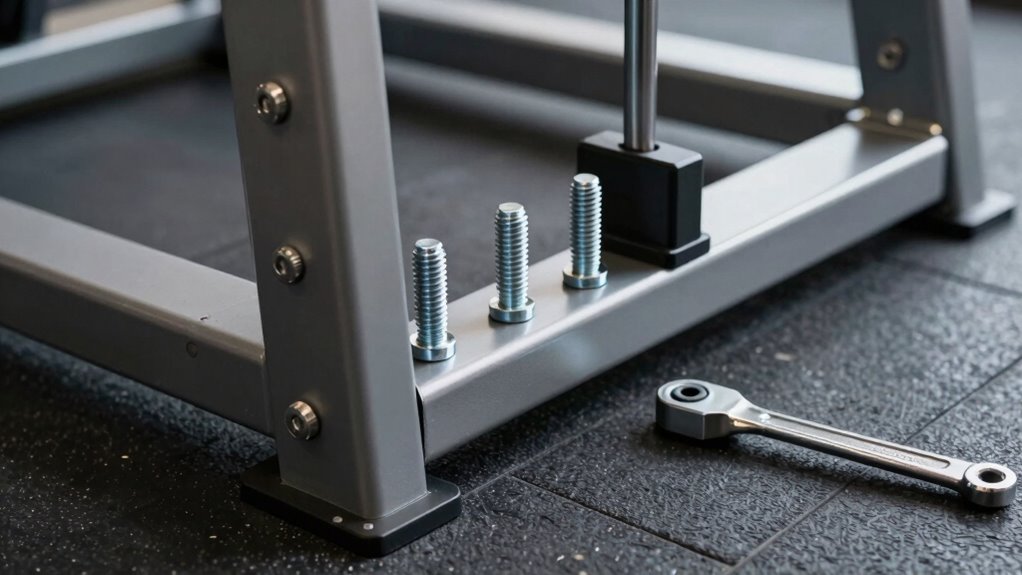
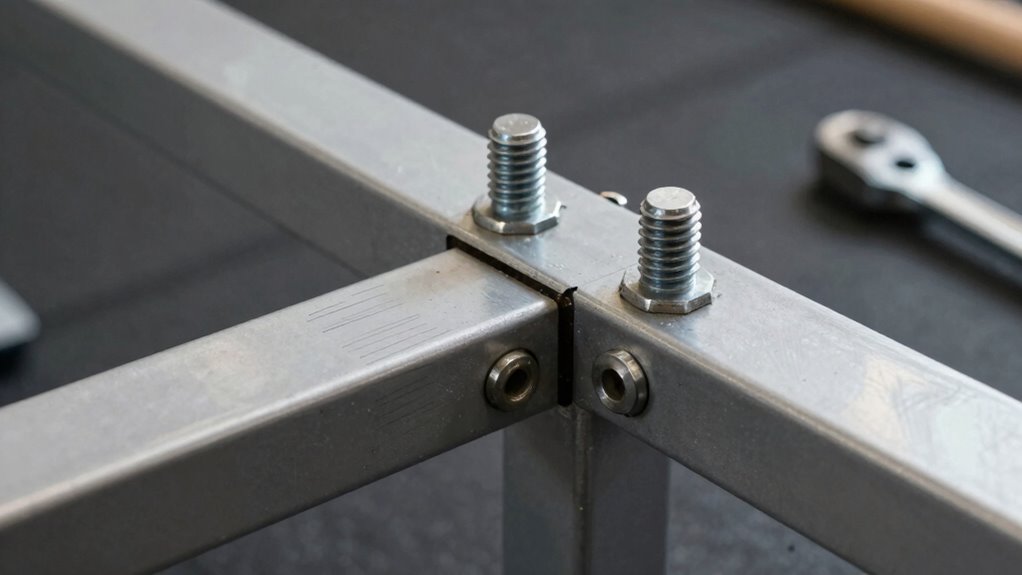
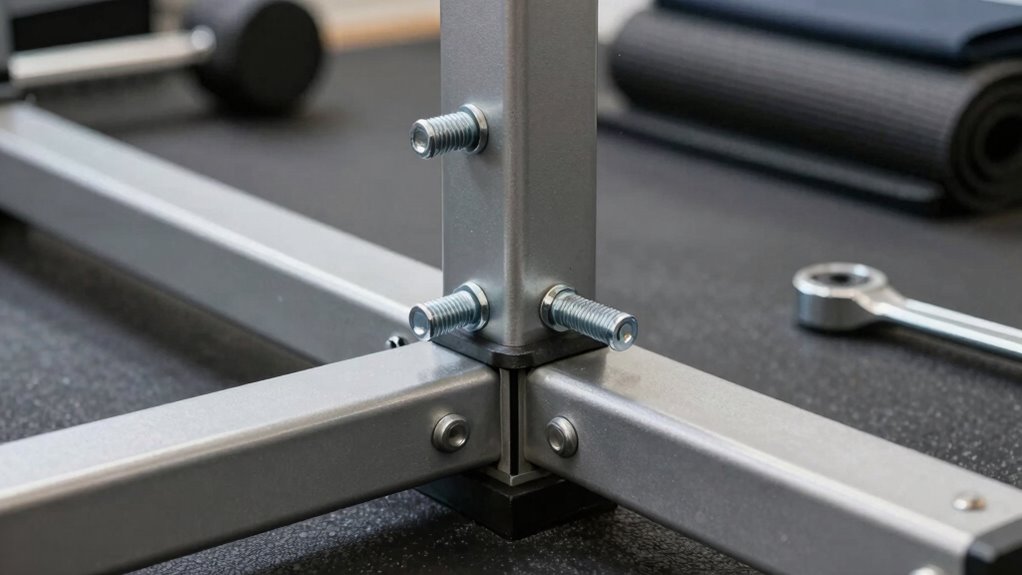
Tighten in Star Pattern
When tightening bolts on your home gym equipment, adopting a star pattern helps guarantee even pressure and prevents wobbling or creaks. This method ensures each bolt is tightened in a sequence that distributes force evenly, reducing stress on the structure. To do this effectively, follow the pattern below:
| Step | Action |
|---|---|
| 1 | Tighten bolt diagonally opposite |
| 2 | Move to the next diagonal bolt |
| 3 | Repeat until all bolts are snug |
Using a star pattern for bolt tightening minimizes uneven tension. It’s especially important when assembling frames or supports, as uneven tightening can cause creaks or wobbling over time. Always double-check each bolt after initial tightening to maintain stability and prevent future issues.
Avoid Over-tightening
Over-tightening bolts can be just as problematic as under-tightening, leading to damage, creaks, or wobbles in your home gym equipment. When tightening, think of it like following nutritional advice—moderation is key. Use a torque wrench if possible, and tighten bolts gradually, avoiding excessive force. Visualize:
- A bolt that’s stripped from too much pressure, making it impossible to secure properly
- Wobbly equipment caused by uneven tightening, disrupting your workout routines
- Cracks forming in the frame from overtightening, risking safety and longevity

KSTZGTA Running Machine Gym Treadmill Maintenance Silicone Oil 30ml Portable Maintenance Tool Gym Equipment for Sports Treadmill Silicone Oil, Blue
Odorless and
As an affiliate, we earn on qualifying purchases.
As an affiliate, we earn on qualifying purchases.
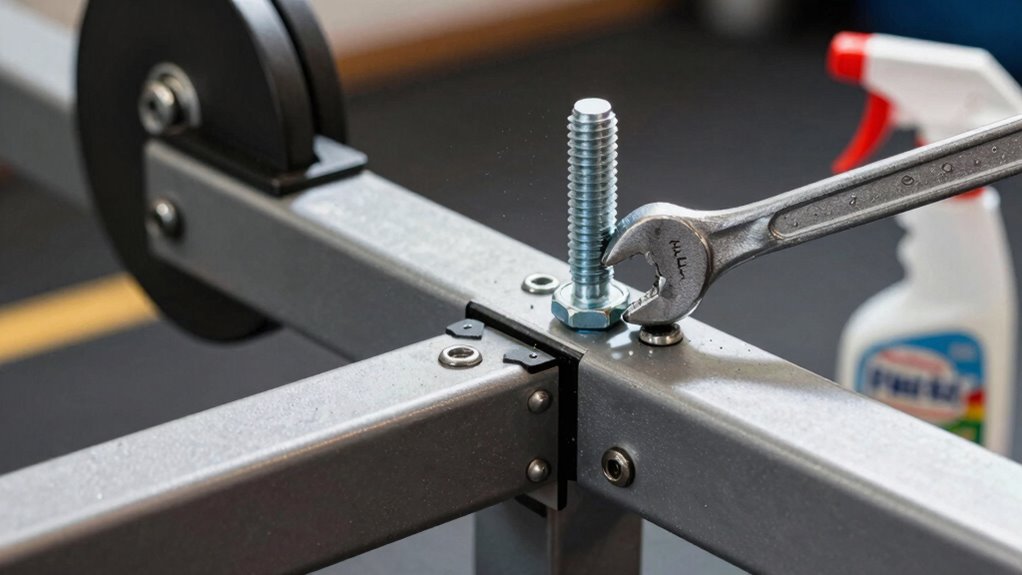
Using the Correct Torque Settings During Assembly for Best Results
Using the correct torque settings during assembly is crucial to ensuring your home gym equipment functions safely and lasts longer. Following established torque guidelines helps prevent over-tightening or under-tightening bolts, both of which can cause problems. Proper bolt calibration ensures each fastener is tightened to the right level, avoiding stress damage or loose parts that could lead to creaking or failure. Use a torque wrench to measure your settings accurately, and always consult the manufacturer’s specifications. Applying the right amount of force guarantees secure connections without risking damage. Remember, tightening bolts too much can strip threads or deform components, while too little can lead to instability. Accurate torque application is essential for safe, durable, and squeak-free equipment.
How Lubrication Can Reduce Noise and Extend Your Equipment’s Life
Applying lubrication to your gym equipment reduces friction and wear, helping it run more smoothly. It also prevents rust and corrosion, extending the lifespan of your machines. Keep everything well-lubricated to save money and avoid noisy workouts.
Reduces Friction and Wear
Have you noticed strange noises or squeaks when using your home gym equipment? That’s often a sign of increased friction causing wear. Proper lubrication techniques can considerably reduce this friction by minimizing direct surface contact between moving parts. Applying the right lubricant creates a smooth barrier, preventing metal-on-metal contact that leads to damage. Imagine:
- Metal parts gliding effortlessly over each other
- Creaks fading into silence during your workout
- Components lasting longer without needing replacement
Using the correct lubrication ensures your equipment runs quietly and efficiently. It also reduces wear on joints, pulleys, and other moving parts. Regularly maintaining surface contact with appropriate lubricants keeps everything running smoothly, extending the lifespan of your home gym gear and making your workouts more comfortable.
Prevents Rust and Corrosion
Proper lubrication not only reduces friction and wear but also acts as a protective barrier against moisture, preventing rust and corrosion on your equipment’s metal parts. Applying lubricant regularly enhances rust prevention by creating a slick surface that repels water and environmental contaminants. This added layer boosts corrosion resistance, ensuring your home gym remains in top condition longer. By keeping metal components well-lubricated, you minimize the risk of oxidation that leads to rust buildup, which can weaken structural integrity. Proper lubrication also makes maintenance easier and helps you spot potential issues early. Remember, consistent lubrication is a simple yet effective way to extend your equipment’s lifespan, maintain prime performance, and keep everything operating smoothly for years to come.
How to Spot Assembly Errors Before Using Your Gym Equipment
Before you start using your new gym equipment, verifying the assembly meticulously to catch any errors early is vital. Conduct a thorough equipment inspection, checking for loose bolts, misaligned parts, and uneven surfaces. Look closely at joints and connectors to guarantee everything is secure and properly fitted. Remember, catching mistakes before use can prevent accidents and ensure user safety.
- Visualize a wobbling bench that shifts under your weight or a pulley system that’s unevenly assembled.
- Imagine noticing loose bolts that could cause parts to detach during exercise.
- Think about discovering misaligned components that might lead to discomfort or injury.
Taking these steps helps you identify potential issues early, avoiding damage and ensuring your equipment functions smoothly. Confirm everything is tight, straight, and stable before your first workout to keep safety a top priority.
Step-by-Step: Assembling Your Home Gym Equipment the Right Way
Starting your home gym assembly with a clear, step-by-step approach guarantees everything fits and functions correctly. Begin by reviewing the instruction manual thoroughly and organizing your tools and parts. Prioritize material selection—choose quality bolts, washers, and other components that match the manufacturer’s specifications. Follow safety guidelines at every stage, wearing protective gear and ensuring the area is clear of hazards. Keep each step precise: assemble heavier parts first, then move to smaller components, tightening bolts gradually to avoid misalignment. Double-check each connection for proper fit before moving on. Taking your time and following this methodical process prevents mistakes, ensures stability, and prolongs the life of your equipment. Your careful approach results in a safe, efficient, and durable home gym setup.
Tips to Keep Bolts Tight and Prevent Creaks Over Time

To guarantee your home gym remains quiet and safe, it’s vital to keep your bolts tight over time. Proper bolt tension ensures your equipment stays stable, reducing unwanted noise and creaks. Regularly check and tighten bolts using a torque wrench to prevent loosening from vibrations. Applying a thread-locking compound can also help maintain bolt tension longer, minimizing noise sources. Visualize this process with these tips:
Keep your home gym quiet and safe by regularly tightening bolts with a torque wrench and using thread-locking compounds.
- Use a torque wrench to achieve consistent tension on bolts, preventing them from loosening.
- Regularly inspect bolts for signs of wear or loosening, tightening as needed.
- Consider applying thread-locking adhesive to lock bolts in place, reducing creaks over time.
Following these steps helps keep your equipment stable, noise-free, and safe for long-term use.
Essential Tools and Resources for a Smooth Home Gym Setup

Having the right tools and resources on hand makes assembling and maintaining your home gym much easier. Start with basic tools like wrenches, screwdrivers, and a drill to tighten bolts properly and avoid creaks later. An adjustable level helps guarantee equipment is stable and aligned during setup. Exercise mats are essential for safety and comfort, protecting your floors and equipment while providing a non-slip surface. Good space planning is also critical; measure your room carefully and designate specific zones for different equipment to maximize efficiency and safety. Use layout templates or apps to visualize your setup before moving heavy items. With these tools and resources, you’ll streamline your gym assembly, reduce mistakes, and create a functional, safe workout space.
Troubleshooting Persistent Creaks and Instability After Assembly
Persistent creaks and instability after assembling your home gym can be frustrating, but many issues stem from loose bolts, misaligned equipment, or uneven flooring. First, check all bolts and tighten any that feel loose, as loose bolts are a common cause of creaking sounds and wobbliness. Next, examine the equipment for proper alignment; misaligned parts can cause strain and noise. Finally, inspect your flooring for uneven surfaces, which can make your equipment unstable and create creaks when weight shifts. To visualize the problem:
- Wobbly bench pressing against uneven tiles
- Squeaky pulleys on uneven concrete
- Shifting weights on tilted floors
Addressing these issues restores stability and silence to your home gym.
Frequently Asked Questions
How Often Should I Check and Tighten Bolts on My Home Gym?
You should check and tighten the bolts on your home gym at least once a month as part of your maintenance schedule. Regular safety inspections help catch loose bolts early, preventing equipment damage or injury. If you notice any creaking, squeaking, or wobbling, tighten the bolts immediately. Consistent checks guarantee your gym stays safe and functional, prolonging its lifespan and giving you peace of mind during workouts.
Can Improper Assembly Cause Long-Term Damage to Equipment?
You might not realize it, but improper assembly can secretly harm your equipment’s longevity. When assembly precision slips, parts wear unevenly or loosen over time, leading to long-term damage. Skipping correct torque or missing bolts can cause stress on critical components, reducing their lifespan. To safeguard your investment, always assemble your gym equipment carefully, follow instructions, and double-check all bolts—this guarantees your equipment stays reliable and lasts longer.
What Are Signs of Incorrect Torque Application During Assembly?
You’ll notice signs of incorrect torque application during assembly if bolts feel too loose or overly tight. During assembly inspection, check if bolts are properly calibrated to the recommended torque levels; over-tightening can cause damage, while under-tightening may lead to instability. Listen for creaks or unusual noises when using your gym equipment. Always verify torque calibration is accurate and perform thorough assembly inspection to prevent long-term issues.
How Do I Identify Hidden Assembly Errors Before Use?
Think of hidden errors as landmines waiting to explode; you need a careful pre-use inspection to spot them. Check all bolts for tightness, ensure moving parts operate smoothly, and listen for unusual creaks or squeaks. Look for misaligned components or loose connections that aren’t obvious at first glance. By thoroughly inspecting your equipment, you catch hidden errors early, preventing potential damage or injury when you start working out.
Are Special Tools Needed for Assembly Beyond Basic Equipment?
You typically don’t need specialized tools beyond basic equipment for home gym assembly if you follow the assembly guides closely. Most manuals include the necessary tools, like screwdrivers and wrenches. However, some advanced equipment might require specialized tools for proper torque or alignment. Always review the assembly instructions beforehand, and gather any recommended specialized tools to guarantee a safe, secure setup without risking damage or misassembly.
Conclusion
Remember, a properly assembled home gym isn’t just about avoiding creaks and wobbles—it’s about safeguarding your workouts and investment. Think of your equipment as a trusted partner; neglecting proper assembly turns that partnership into a shaky alliance. Take your time, follow the steps, and tighten those bolts with care. When you do, you’ll gain access to a safer, quieter workout space that stands the test of time—because every detail counts in building your fitness fortress.