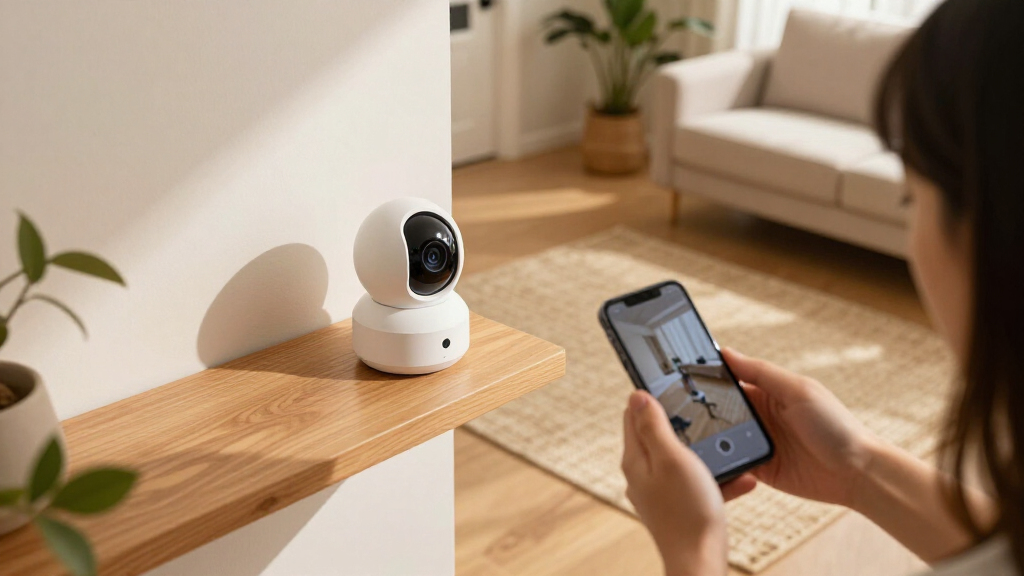
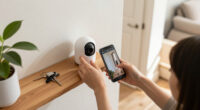
This guide walks you through choosing locations, installing, connecting, and testing smart home security cameras. It is for homeowners and renters who can use a smartphone app and want a working camera system without leaving gaps in coverage or exposing private footage. Allow about 1-3 hours, depending on the number of cameras, mounting work, and Wi-Fi signal.

Get home appliances delivered free with Prime
- Fast, free delivery on millions of items
- Prime Video, Amazon Music and more included
- Member-only deals all year

Blink Outdoor 4 Wireless Smart Security Camera System (5 Cameras)
- ✔ Camera count: 5
- ✔ Resolution: 1080p HD
- ✔ Field of view: 143° diagonal
Blink Outdoor 4 Wireless Security Camera System, 3 Cameras
- ✔ Camera count: 3
- ✔ Video resolution: 1080p HD
- ✔ Night vision: Infrared
Blink Outdoor 4 Wireless Security Camera System, 2 Cameras
- ✔ Camera count: 2
- ✔ Video resolution: 1080p HD
- ✔ Night vision: Infrared
Difficulty: Beginner | Time: 1-3 hours
What You’ll Need
Tools & Materials:
- Smart security cameras and any included mounts, power adapters, or batteries
- Smartphone or tablet with the camera maker’s app installed
- Home Wi-Fi network name and password
- Phillips screwdriver and drill with suitable bits, if mounting cameras
- Ladder for high mounting locations, used on stable ground
- Measuring tape and pencil
- Outdoor-rated extension or power supplies only if approved by the camera maker
Knowledge:
- Basic smartphone app use
- Access to the home Wi-Fi network and router
- Ability to use a screwdriver; basic drilling skills if making holes
Check that the camera supports your Wi-Fi band, phone, and any smart-home platform you plan to use. Confirm whether it records to cloud storage, a local card, or a hub, and whether a subscription is needed. For a rental, get permission before drilling. Do not mount a camera where it can fall, block an exit, or expose wiring to rain. Allow extra time for charging batteries or updating firmware.
Blink Outdoor 4 Wireless Smart Security Camera System (5 Cameras)
When a property has several entrances, a driveway, or detached areas to watch, this five-camera bundle offers the most complete starting point in this lineup. It shares the same 1080p video, infrared night vision, two-way audio, and enhanced motion detection as the smaller systems, but supplies enough cameras to cover more locations without immediately expanding the kit. That makes it our overall pick for buyers whose priority is coverage across multiple zones, rather than getting the smallest possible installation.Its wireless design and claimed battery life of up to two years can make positioning more flexible than a system that needs a power cable at each camera. Alexa integration also gives households a familiar way to manage compatible security functions. Still, five cameras mean more placements to plan, and wireless convenience depends on usable 2.4 GHz Wi-Fi at each location. The broad field of view helps capture a wide area, but it does not replace careful camera positioning when entrances or paths need distinct views.The main caveat is common to every bundle here: the included Sync Module Core does not provide local storage. Buyers must consider cloud storage after the trial or acquire separate hardware for local backup. Person detection also requires an optional subscription. Compared with the three-camera system, this bundle is worthwhile when the extra coverage will be used; if two or three viewpoints are enough, the smaller kits avoid deploying cameras you may not need.
Pros:
- Five cameras provide the broadest coverage in this comparison.
- 1080p live view, infrared night vision, and two-way audio support everyday monitoring.
- Claimed battery life of up to two years can reduce routine battery changes.
- Alexa compatibility and enhanced motion detection add useful smart-home controls.
Cons:
- The included Sync Module Core does not support local storage.
- Cloud storage beyond the trial and person detection require an optional subscription.
- Five camera locations require adequate Wi-Fi and more installation planning.
Best for: Households that want to cover several exterior approaches, entrances, or outbuildings with one starter system.
Not ideal for: Buyers who only need one or two viewpoints, want local storage included, or prefer to avoid subscription-dependent features.
Bottom line: We recommend the five-camera system when wide property coverage matters more than keeping the installation minimal, provided you plan for storage separately.
“We recommend the five-camera system when wide property coverage matters more than keeping the installation minimal, provided you plan for storage separately.”
Blink Outdoor 4 Wireless Security Camera System, 3 Cameras
For many homes, three cameras are enough to monitor a front entrance, a rear entrance, and one additional area such as a garage or side passage. This bundle earns our best balanced designation because it offers more flexibility than the two-camera kit without committing to the broader deployment of the five-camera package. The cameras share the same core capabilities across the lineup, so the decision is less about image features and more about whether three viewpoints match your property.With 1080p HD live view, infrared night vision, two-way audio, and enhanced dual-zone motion detection, the system covers the fundamentals for routine outdoor monitoring. Its claimed battery life of up to two years also suits buyers who do not want to route power to every mounting point. Alexa compatibility is useful for households already using Alexa devices, although the supplied details do not make this a different smart-home platform choice from the other two bundles.Storage deserves attention before we call this an easy middle-ground pick. The included Sync Module Core has no local storage, and continued cloud storage requires a subscription after the trial. Person detection is also subscription-dependent. Compared with the five-camera package, the three-camera kit gives up coverage rather than camera performance; compared with the two-camera version, it buys a third monitoring position. Choose it when that extra angle has a clear job, not simply because a middle-sized bundle sounds safer.
Pros:
- Three cameras suit common multi-entrance layouts without expanding to five units.
- 1080p video, infrared night vision, and two-way talk match the core features of the larger bundle.
- Up to two years of stated battery life supports flexible placement.
- Enhanced motion detection and Alexa compatibility are included.
Cons:
- Local storage is not included with the Sync Module Core.
- Person detection and ongoing cloud storage require an optional subscription.
- Three cameras may not cover larger properties or multiple detached areas.
Best for: Households seeking coverage for three key outdoor areas, such as front and back doors plus a garage or side path.
Not ideal for: Buyers who need to monitor many separate zones or want local video storage included with the system.
Bottom line: The three-camera system is our practical middle choice when two viewpoints feel limiting but five would be more coverage than the home needs.
“The three-camera system is our practical middle choice when two viewpoints feel limiting but five would be more coverage than the home needs.”
Blink Outdoor 4 Wireless Security Camera System, 2 Cameras
If your security plan starts with two specific locations, this bundle is the simplest match in the group. It includes two Outdoor 4 cameras and the same Sync Module Core used by the larger kits, so buyers still get 1080p live view, infrared night vision, two-way audio, enhanced motion detection, and Alexa compatibility. We rank it third not because its cameras have fewer stated core features, but because its smaller camera count limits how much of a property it can cover at once.This option makes sense for a small home, apartment entry and patio, or a buyer who wants to begin with a pair of views before considering a wider system. Its claimed battery life of up to two years avoids routine wired installation, while the included lithium AA batteries get the system started. Compared with the three-camera bundle, the two-camera kit gives up a useful third angle; compared with the five-camera system, it is easier to keep the setup focused on just the areas that matter most.The same storage tradeoff applies: local backup is not included, and the Sync Module Core does not support it. Cloud storage beyond the trial requires a subscription, as does person detection. Two cameras can be a sensible entry point, but buyers should map sightlines first: if you need to watch three entrances or a separate driveway and side passage, choosing this kit may lead to an expansion sooner than expected. We would favor it when a small number of clearly defined viewpoints is the actual need.
Pros:
- Two cameras suit focused monitoring of a pair of entrances or outdoor areas.
- Core 1080p, infrared night vision, and two-way audio features match the larger bundles.
- Claimed battery life of up to two years keeps routine battery maintenance low.
- Works with Alexa and includes enhanced motion detection.
Cons:
- Two cameras provide the least coverage of the three bundles.
- The included Sync Module Core does not offer local storage.
- Person detection and cloud storage beyond the trial require an optional subscription.
Best for: Small households or first-time buyers who want two defined outdoor views and prefer a compact initial setup.
Not ideal for: Owners who need three or more simultaneous viewpoints, or anyone who expects local recording without extra hardware.
Bottom line: Choose the two-camera system when you have two clear monitoring priorities and want to avoid installing cameras across areas you do not need to watch.
“Choose the two-camera system when you have two clear monitoring priorities and want to avoid installing cameras across areas you do not need to watch.”
As an Amazon Associate we earn from qualifying purchases.
Before You Start
Decide what you need to monitor before opening the app. Common goals include seeing a front entrance, driveway, or shared indoor entryway. Point cameras at your own property and avoid recording inside a neighbor’s home or areas where people expect privacy. Check local rules about audio recording and video surveillance, particularly in shared or rented spaces.
Keep your Wi-Fi password and account recovery method available. Use a unique password for the camera account and turn on two-step verification if the service offers it. Do not share account access until you have configured the camera and checked what each invited user can view or change.
Step-by-Step Instructions
Step 1: Choose the areas to monitor
Walk around your home and list the entrances or approaches you want to see. Choose camera positions that capture faces and movement near those areas, rather than distant scenery. At each position, check for a clear view without glass glare, branches, heavy traffic, or an object that could block the lens. For outdoor cameras, select a sheltered position within the camera’s rated temperature and weather limits.
Plan to cover the most useful areas first. One well-placed camera can be more helpful than several cameras aimed at the same space. Avoid pointing a camera into bedrooms, bathrooms, or a neighbor’s private area.
Tip: A camera behind a window may reflect indoor lights or fail to detect motion through glass. If you need outdoor coverage, mount an outdoor-rated camera outside when it is safe and permitted.
Check: You have a short list of locations, and each one has a clear view of a specific entrance or area without an obvious privacy concern.
Step 2: Check power and Wi-Fi at each location
Confirm how each camera receives power: battery, plug-in adapter, or wired connection. For battery cameras, charge the battery as directed. For plug-in models, identify a nearby outlet and route the cable so it will not create a trip hazard or be exposed to weather. Do not use an indoor adapter outdoors unless the manufacturer specifically rates it for that use.
Stand near each planned location with your phone and check the Wi-Fi signal. If the camera app provides a signal check, use it. A weak connection can cause delayed alerts, dropped video, or failed setup. If coverage is poor, move the camera closer to the router or consider a compatible access point or mesh node.
Tip: Do not drill until you have confirmed that the camera can stay powered and connected from the chosen position.
Check: Each location has a safe power plan and a usable Wi-Fi signal, or you have identified a network change needed before mounting.
Step 3: Add the cameras in the app
Connect your phone to the home Wi-Fi network, open the manufacturer’s app, and sign in or create an account. Use a unique password, and enable two-step verification if available. Select the option to add a device, then follow the prompts to scan the camera’s setup code or enter its details.
Connect the camera to the Wi-Fi band it supports. Some models only use 2.4 GHz during setup. If the app cannot find the network, check the camera instructions and router settings rather than guessing or resetting other devices. Install any offered firmware update while the camera is near the router and has stable power.
Tip: Keep the camera close to the router during setup. After it is online and updated, move it to its planned location and test the connection again.
Check: The app shows the camera online and displays a live image. Any firmware update has finished without an error.
Step 4: Mount each camera securely
Hold the camera at the planned position and use its live view to check the framing before marking holes. Aim it to show the area people enter, with enough light to distinguish faces at the expected distance. Follow the maker’s instructions for mounting height, angle, and weather protection.
Mark the screw holes, then use the included anchors or fasteners suited to the wall material. Check for hidden wires and pipes before drilling. Attach the mount firmly, fit the camera, and tighten any adjustment joints so wind or vibration will not shift the view. Route and secure cables without pinching them or leaving a loose loop someone could pull.
Tip: Use a helper to steady a ladder or check the live view while you adjust a high camera. Do not overreach from a ladder.
Check: The camera is firmly attached, its cable or battery is secure, and the live view covers the intended area.
Step 5: Set recording, alerts, and privacy
In the app, set the correct location, time zone, and camera name so alerts identify the right device. Choose whether the camera records continuously or only when it detects activity, based on its capabilities, storage plan, and your needs. Set motion zones to focus on your property and reduce activity from sidewalks, roads, or moving branches. Adjust sensitivity gradually rather than starting at the highest setting.
Choose alert types and quiet hours that fit your routine. Review audio recording, face recognition, and other optional features separately; turn off anything you do not need. Set a strong account password, enable two-step verification where available, and limit shared access to trusted people.
Tip: Motion zones and alert sensitivity may need adjustment after you see how the camera behaves during normal activity.
Check: The camera has a clear name, recording and alert settings match your needs, and privacy and account security settings have been reviewed.
Step 6: Test the complete system
From the app, check the live view for every camera and confirm that the image is clear by day and after dark, if night vision is included. Walk through the monitored area to trigger motion detection. Confirm that the app sends the expected alert and that a recording appears in the selected storage location.
Test again with the door closed and lights in their normal evening state. Check that motion zones do not trigger repeatedly from activity you meant to exclude. If you rely on a siren or smart-home connection, test it using the manufacturer’s instructions and tell household members before activating any loud alarm.
Tip: Do not assume a live image means recording is working. Check an actual saved event or playback clip.
Check: Every camera shows live video, captures a test event, sends the expected alert, and stores footage where you can retrieve it.
Step 7: Review access and document the setup
Review the app’s list of account users and remove anyone who should not have access. If you invite household members, give each person only the permissions they need. Save the camera model, support details, and any relevant setup information in a secure place; do not leave Wi-Fi or account passwords beside the camera.
Check the app for battery status, storage status, and connection warnings. Set a reminder to review these indicators and clean camera lenses when needed. Keep the app and camera firmware updated, using the maker’s instructions.
Tip: If a household member changes phones or leaves the household, review account access rather than sharing your main login.
Check: Only intended users have access, and you know where to check camera health, stored clips, and update notices.
Common Mistakes to Avoid
- Mounting the camera before confirming Wi-Fi and power. — Test the network and power plan at the intended spot before drilling. Keep the camera near the router during initial setup and verify its connection again after moving it.
- Aiming the camera at a broad area instead of the key approach. — Frame entrances and likely movement paths. Use live view and a test walk to check that people are visible at a useful distance.
- Leaving default or shared account credentials in place. — Set a unique password, turn on two-step verification when available, and invite users through individual accounts with limited permissions.
- Setting motion sensitivity too high or recording areas outside the property. — Use motion zones, reduce sensitivity in small increments, and adjust the camera view to respect neighbors’ privacy and applicable recording rules.
Troubleshooting
Problem: The app cannot find the camera or Wi-Fi network.
Solution: Move the camera near the router, confirm it is in setup mode, and check the manufacturer’s supported Wi-Fi band and security settings. Restart the camera and app, then repeat setup. Use the maker’s reset procedure only if ordinary setup fails.
Problem: The camera goes offline after mounting.
Solution: Check signal strength at the camera, power or battery status, and whether the mount or wall blocks the signal. Move it closer to the router or add a compatible access point, then reconnect and test live view.
Problem: Alerts arrive too often or miss activity.
Solution: Review motion zones and sensitivity, then test one setting change at a time. Check for blocked views, reflections, and moving plants. Confirm notifications are allowed in both the camera app and the phone’s system settings.
Problem: Live video works, but clips are missing.
Solution: Check that recording is enabled, the selected storage plan or card is active, and the camera’s date and time are correct. Review storage capacity and subscription status, then create a new test event and check playback.
What Success Looks Like
Your setup is complete when every camera stays online at its mounted location, shows the intended area clearly, and records a test event. Motion alerts should arrive on the intended phone, clips should be available in the chosen storage location, and account access should be limited to approved users. Check the view in both daylight and darkness if you expect the cameras to operate around the clock.
Next Steps
For the first few days, review alerts and saved clips to spot blind areas or false alarms. Adjust motion zones and sensitivity in small increments, then repeat the walk-through test. Check battery, storage, and connection status on a regular schedule, clean the lens when the image becomes hazy, and install app or firmware updates from the manufacturer. Recheck camera angles and user access after moving equipment, changing your Wi-Fi network, or changing who lives in or manages the home. Contact the manufacturer or a qualified installer if wiring, persistent connectivity faults, or mounting safety issues remain unresolved.
Frequently Asked Questions
Do smart security cameras need Wi-Fi?
Most smart cameras need Wi-Fi for app access, alerts, and cloud features. Some record locally to a card or hub, but may still need a network for setup or remote viewing. Check the camera’s specifications before buying or placing it.
Can I install a smart camera without drilling?
Some indoor cameras use a shelf or tabletop stand, and some models support adhesive mounts. Use only a mount approved for the camera and surface. For outdoor or high locations, use a secure mounting method that can safely support the camera in expected weather.
Do I need a subscription to save video?
It depends on the camera. Some models require a subscription for cloud recording, while others support local storage on a card or hub. Check the storage options, clip retention period, and any plan costs before setup.
How many cameras should I install?
Start with the entrances or areas you need to monitor, then add cameras only where they provide useful coverage. Check each camera’s field of view and Wi-Fi reach; placing more cameras does not fix an obstructed view or weak connection.
How can I reduce false motion alerts?
Adjust motion zones to exclude roads, sidewalks, and moving foliage, then lower sensitivity in small steps. Confirm that the camera is stable and that reflections or changing shadows are not causing detections. Test each change with a walk-through.
Halloween Picks
halloween
As an affiliate, we earn on qualifying purchases.